With the advent of technology, our company is constantly processing online transactions and payments. This development has created opportunities for the development of many companies (which are solely responsible for helping online payments). At the top of the market for online and mobile payments is PayPal. At the end of 2019, PayPal had over 305 million users worldwide.
However, although PayPal is primarily known as an online payment system, it offers a number of additional services. One of the best: the ability to create shipping labels! This guide will walk you through the benefits of using PayPal to create shipping labels, how to create a shipping label with PayPal, and tips for success.
Table of Contents
What are the advantages of shipping with PayPal?
There are many benefits to creating shipping labels with PayPal, including:
- Cost Savings: Unlike many other online payment and shipping companies, PayPal doesn’t charge any monthly or usage fees. PayPal also offers its customers discounted commercial rates on UPS and USPS postal rates. This means that the amount you pay for postage through PayPal is likely to be lower than the standard postage price offered on the UPS and USPS websites.
- Save Time: If you already transact online, you can now keep your invoices, receipts, shipping labels and tracking numbers in one place for easy access. Printing labels yourself also saves you wasting precious time in the mail queue to send your packages. As anyone who’s lined up over the holiday season can attest, it can save a lot of time!
- Increased Professionalism: If you are sending packages for work, professionalism is usually on your mind. With PayPal labels, you get professional, consistent labels from the comfort of your home. Additionally, PayPal offers the option to hide shipping costs when printing the label – an added benefit for the business shipper.
But don’t take our word for it. Check out the instructions below on how to print labels with PayPal and try it yourself.
How to create a PayPal shipping label with an invoice
To create a shipping label for a transaction that was made through PayPal:
- Log into your PayPal account.
- On the Activity tab, find the recent transaction for which you want to create a tag.
- Click on the desired order to expand the order details and select Print Shipping Label.
- Choose your carrier (PayPal offers UPS and USPS delivery).
- Enter and verify the shipping information.
- After making sure your information is correct, click Confirm and Pay. You will have the option to pay with a credit card or with your PayPal balance.
- Click Print Label to generate your label for printing. If your shipping label does not open in a new window, turn off the pop-up blocker in your browser and try again.
- Print the label and stick it on the package to be sent.
For more information and to make sure your package arrives on time without complications, see the additional considerations below.
How to Create a Shipping Label with PayPal without a Purchase, Transaction, or Invoice
To create a shipping label for a parcel that is not associated with a PayPal transaction:
- Login to your PayPal account.
- Go to http://www.paypal.com/shiplabel/create/. This page is incredibly difficult to find on the PayPal website. If you plan on printing labels with PayPal regularly, we would recommend bookmarking this address in your browser.
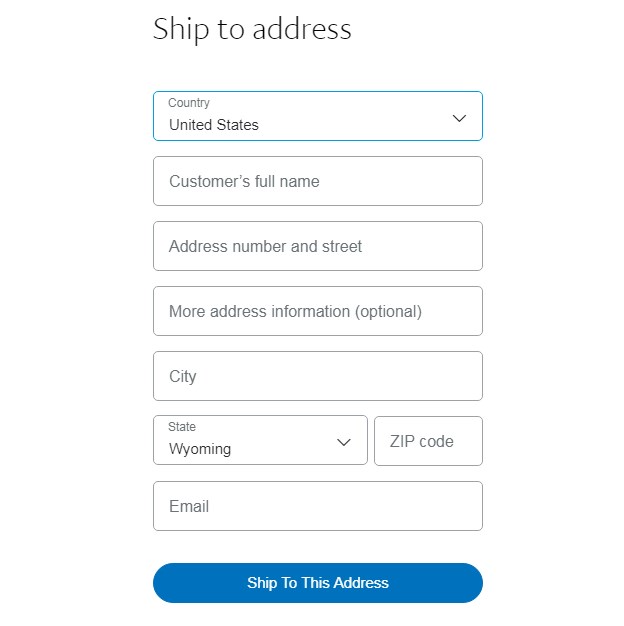
- A pop-up will appear for you to enter the recipient’s shipping address. Enter the recipient’s address and click Ship To This Address.
- Enter the address you will ship from. This will be the “return to sender” address if there is a problem, so be sure to use your address and not the post office address your package will be shipped from.
- The next step is to select the freight service you want to use. PayPal allows you to ship with UPS and USPS and offers several service options. Select the service that’s right for you (depending on the size of your package, deadline, and budget).
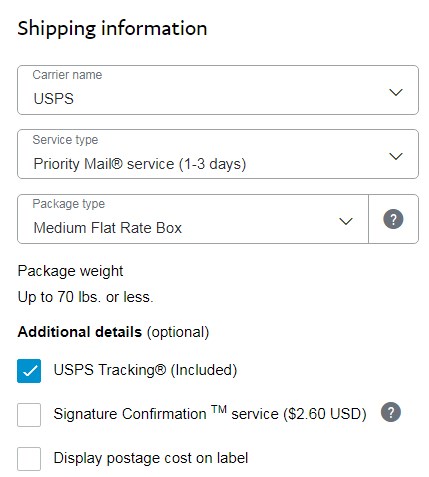
Step 5 - After selecting the shipping method, you will need to enter the package information. Depending on the type of package you are sending, PayPal will ask you to include the weight (in pounds and ounces) and / or measurements (in inches) of your package. Please make sure these measurements are correct or your package can be returned.
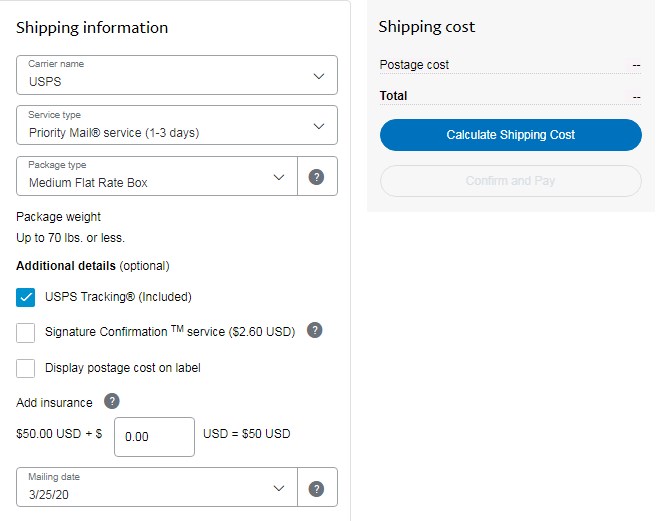
- Enter your shipping date. This date will be auto-populated for the current date, so if you plan to leave your package at the post office at a later date, be sure to change this date to reflect that.
- Click on Calculate shipping costs on the right side of the screen. This will fill in the shipping cost based on the information you provided.
- When you are satisfied with the correct information, click Confirm and Pay. You will have the option to pay with a credit card or with your PayPal balance.
- Click Print Label to generate your label for printing. If your shipping label does not open in a new window, turn off the pop-up blocker in your browser and try again.
- Print the label and stick it on the package to be sent.
While it may seem like a series of steps, the process itself is pretty straightforward. To help streamline the process and ensure your package arrives on time without complications, check out the additional considerations below.
Additional considerations
To make sure your PayPal shipping label printing runs smoothly, here are some quick tips:
- Most shipping options on PayPal require the length (in inches) and weight of the package (in pounds and ounces). Therefore, a tape measure and a scale are needed to determine accurate information. Creating a shipping label with the wrong size or weight may result in your package being returned.
Tips for Create a Shipping Label with PayPal without a Purchase - When printing your label, you can use paper or label paper. If you decide to use label paper, the best size for PayPal shipping labels is the 369 label, which measures 7.375 “x 4.5”.
- If you are using copy paper to print your labels, be sure to cover the entire label with clear packing tape when attaching it to your package. Uncovered paper labels may fall, tear or bleed, causing the packaging to be returned or lost.
- PayPal can also generate labels for international shipments. When filling out shipping information, PayPal will add additional steps to help you create the necessary customs forms and / or delivery notes.
- All PayPal shipping options include the option of additional plan insurance. If you choose to ship with Priority Mail, it comes with $ 50 free insurance. For the best rate, do not add insurance to your Priority Mail shipments unless you need coverage in addition to the $ 50 provided.
- PayPal will allow you to cancel shipping labels for 48 hours after they are created. If you make a mistake or cancel an order, be sure to cancel the label so you don’t lose your money!
Once the PayPal shipping label for your package has been affixed, see our Guide to USPS Collection Boxes to find a shipping location near you. For more information about shipping and shipping, see our other shipping guides or Comment Below.

)